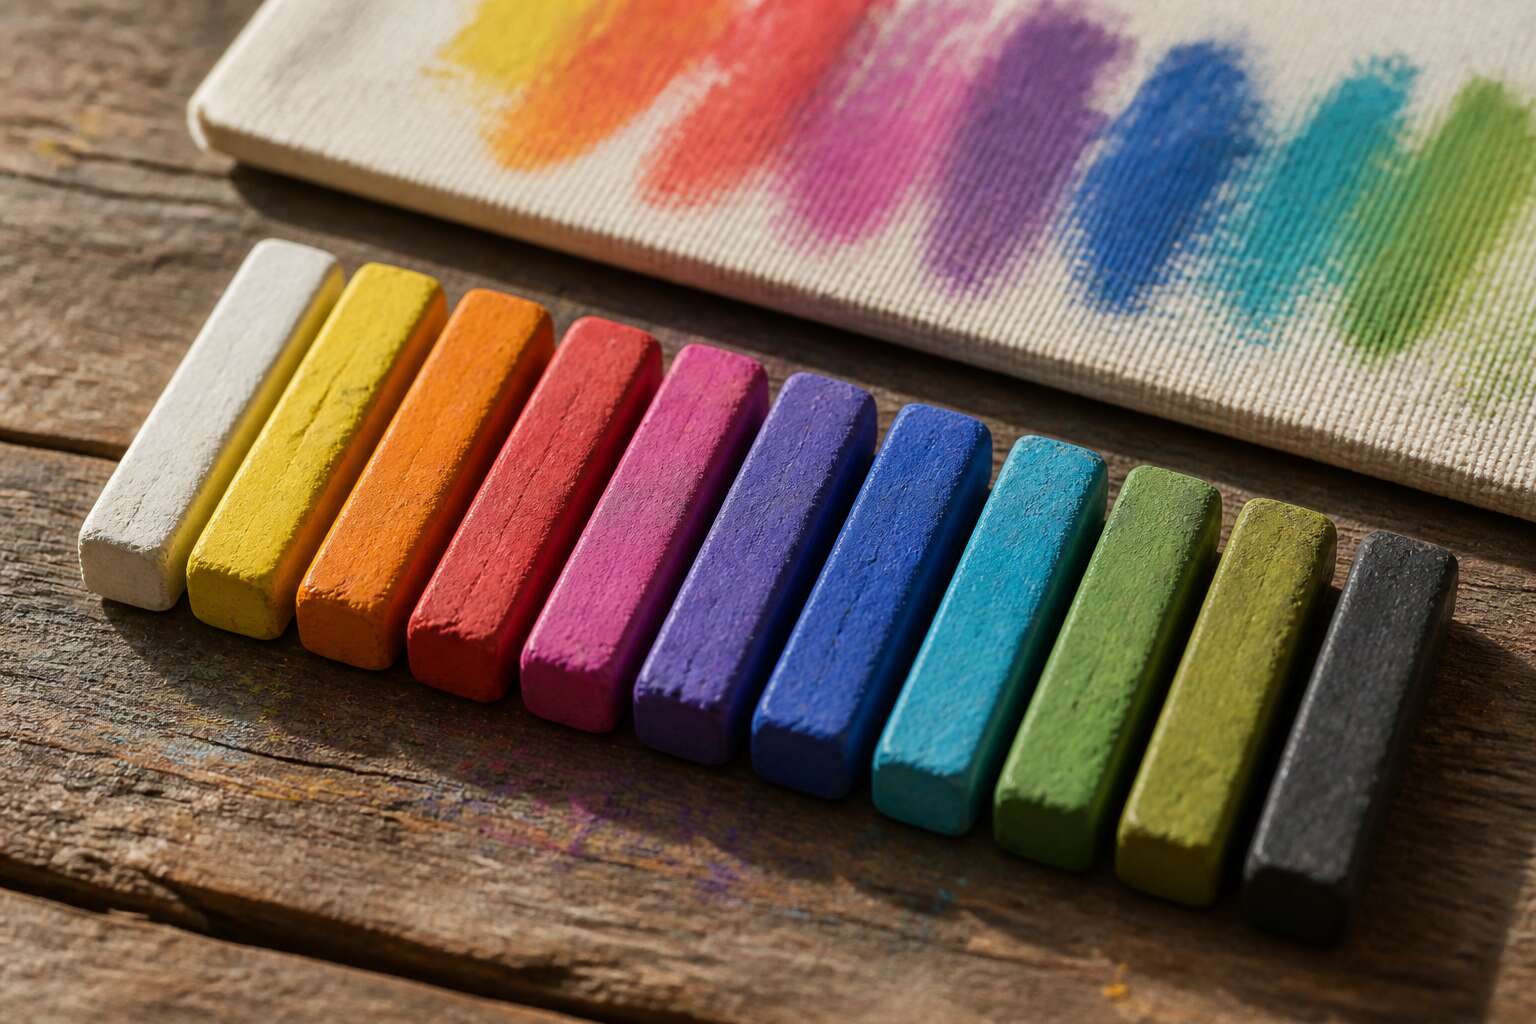
What Makes These Drawing and Painting Tools Unique
Composition and Consistency
Every year, artists discard hundreds of half-used paint tubes simply because the medium oxidized or separated. Pigment sticks bypass that loss entirely. Their composition relies on a high pigment load pressed into a waxy binder, which resists drying out and keeps the colour lively for years.
The consistency is equally deliberate. At room temperature, a stick feels firm, but the heat from fingers softens the outer layer instantly. This gives the artist control over thickness, layering, and blending without solvents. In South Africa’s varied climate, pigment sticks maintain their structure, so no time is wasted coaxing a material back to life.
Differences from Traditional Pastels and Crayons
Pastels crumble into clouds of dust, and crayons leave a greasy, translucent mark. Pigment sticks offer something else entirely. They hold a firm edge for drawing, then soften under thumb pressure to spread like paint. That flexibility comes from how the stick reacts to warmth, not from added oils or solvents!
One stick can produce a hairline stroke, a bold block of colour, or a textured scumble. You can layer them without waiting for drying time, and they sit on surfaces that repel traditional pastels, such as gessoed board or raw timber. The finish is permanent and lightfast, which is why many illustrators prefer them for outdoor sketching.
- No dust means no respiratory irritation and no accidental smudging.
- They work on dark grounds, revealing true hues instead of muddying.
In South Africa’s humidity or dry heat, these sticks keep their character, so your hand stays in control!
Ideal Surfaces for Application
Pigment sticks let you draw a crisp contour and then spread the same mark into a wash. A firm stroke gives a thin line. Press with your palm and the waxiness turns into a painterly smear, no extra tools involved. This makes them a very short route from hand to surface. There is no can, brush, or drying time.
Surfaces are forgiving. A smooth panel shows the grain, while a slightly rough fibre takes a little paint. Experiment with uncoated timber, thick cotton paper, or a sealant-free board.
A sensible starter set of surfaces:
– craft paper, which lifts the colour
– raw timber, which grips the body
– a fine-sanded gesso board, which layers cleanly
Little of the stick is wasted. The medium stays where you put it, so your hand is free to change direction without waiting.
Essential Techniques for Beginners and Pros
Layering and Blending Basics
Blending with pigment sticks is less about force and more about finesse. I have seen beginners press hard, leaving tracks that resist correction. Pros rely on a gentle wrist and a slow build. Apply a thin base layer, then add a second hue while the first is still tacky.
Use a fingertip to soften the boundary between colors. A cloth works too, but only for small areas. Avoid overworking; that drags pigment into a muddy mess. Trust me, patience beats aggression!
- Feathering: light strokes along the edge.
- Scumbling: circular motions to blend gradually.
- Grading: increasing pressure from one end to the other.
These basics give any artist control over intensity and depth. Pigment sticks reward patience, not aggression.
Creating Fine Details with Pointed Tips
Pigment sticks deliver a crisp edge, perfect for fine lines. Beginners can hold the stick like a pencil and use the factory taper. Pros often sharpen it with a craft knife to expose a clean point. This changes how the medium behaves.
- Use the pointed tip for hair strands and grass.
- Twist the stick as you draw to maintain the point.
- Test on scrap paper to gauge pressure before touching your surface.
Fine detail demands a light touch. Pressing hard flattens the point and creates waxy build-up. Instead, let the stick skim across the tooth of the paper. I often see beginners try to force a line with pigment sticks. The fix is always the same: slow down and let the pigment do the work.
Using Solvents to Achieve Wash Effects
The quiet alchemy of pigment sticks reveals itself when you introduce a solvent. A whisper of turpentine or a touch of isopropyl alcohol transforms the waxy mark into a fluid wash, breathing liquid life into your work. This is where the medium stops being a drawing tool and becomes an entire painting system, capable of delicate glazes or bold, sweeping stains that carry the pigment across your support with surprising agency.
For the uninitiated, the process is a study in restraint. Dip a soft brush or cotton pad into your chosen solvent and pull it through the initial stroke. The pigment dissolves instantly, creating a watercolour-like effect that settles into the paper’s grain. The binder, softened by the solvent, releases its hold on the colour. You must work quickly, as the medium dries fast, but the resulting luminosity rewards your haste. A novice finds wonder here, watching a solid line bloom into a translucent veil.
The professional, however, wields this technique with a more deliberate purpose. They use the solvent to push the pigment towards the edges of a form, creating a halo of colour that mimics the fall of light. They may apply solvent to the paper first, then draw into the damp patch for a fractured, unpredictable line. Consider these methods to expand your vocabulary with pigment sticks:
- Use a spray bottle for an even mist, softening the pigment for a textural bloom.
- Employ a palette knife dipped in solvent to scrape away pigment, revealing the untouched paper below.
- Layer a solvent wash over a dense stroke to create a wash effect that recedes into the background.
The real power lies in controlling the drying time. With a slower drying solvent like a citrus thinner, you gain minutes to manipulate the wash, pulling and tugging the pigment across the surface. With a fast evaporator, you lock the edges in place, granting a sharpness that a brush alone cannot achieve. This blend of drawing and painting becomes a dance between control and accident, a process where the artist learns to partner with the material’s changing state.
Stenciling and Masking Methods
There is a special place in the studio for artists who peel a stencil too early. The waxy binder of pigment sticks holds a crisp edge, so masked shapes stay sharp. Beginners should start with low-tack tape and a simple geometric stencil. Press firmly, apply the stick with a light touch, and peel away to reveal a clean line. Pros push further by layering multiple stencils, shifting them between passes to create depth and accidental collisions.
- Use a craft knife to cut freehand stencils from acetate, then wipe the stick’s tip after each pass.
- Apply a liquid frisket with a brush, let it dry, and rub it off after the pigment sets.
- Lift a corner of the tape while the pigment is still soft to create a feathered edge.
The real trick is timing. Remove the mask too early and you smear the mark; too late and the binder locks the shape permanently. Pigment sticks forgive mistakes, but they remember hesitation.
Choosing the Right Set for Your Artistic Needs
Evaluating Color Range and Pigment Load
Most artists I know own at least one set of supplies they never touch. That unused drawer of half-broken tools is a kind of economic monument to poor planning. With pigment sticks, the sizing problem is a little more acute because these giants of the medium are sold as individual units or curated kits. Buying a 24-piece box because it was on sale is a mistake. The real cost is not the price tag, it is the shelf space and the guilt.
Consider first the chromatics. A set of 12 pigment sticks might offer a more coherent palette for a limited figure study, while a broader range of 30 is better for landscapes where you need subtle transitions between earthy browns and cool greys. However, the pigment load matters more than sheer quantity. A single stick with a high concentration of pure iron oxide will outperform three sticks of mixed, diluted filler. You want a stick that melts onto the paper with a single stroke, not one that requires relentless pressure to leave any trace of color.
When you are evaluating a potential set, do not just look at the swatches. A swatch on smooth card stock tells you nothing about the tooth of rough watercolour paper. Instead, check the binder. The pigment load dictates the strength of the colour and its permanence. A high pigment load means less binder, which means a stick that is slightly more crumbly but intensely vibrant. A low load means a stick that is waxy and smooth but will fade into pastel nothingness.
Here is what I look for when testing a new kit:
– The stick should feel slightly tacky, not hard like a crayon.
– Smearing a mark on your thumb should leave a rich, opaque stripe.
– The sticks should not be overly porous or chalky to the touch.
– Check whether the colour remains consistent from the first stroke to the tenth stroke, without hidden streaking.
When you choose a set, ignore the marketing jargon about professional grade and focus on the actual flick. If the pigment sticks do not feel like they are alive in your hand, they are not the right tools for the work. You do not need every colour under the sun, you need the right pigments that do the heavy lifting. A smaller selection of honest, dense pigments will always serve you better than a vast, translucent rainbow. The thickness of the stick matters physically as well; a skinny stick might feel like a pencil but lacks the momentum for broad shoulder work. A chunky stick offers control when used on its side. Your decision should be about the marriage of texture and saturation, not the quantity of the box.
Comparing Stick Hardness and Oil Content
A stiff pigment stick is a loud, unpleasant surprise against the skin. Hardness decides how much pressure you waste, and oil content decides how much stay stays on the paper. I test each stick by pressing the tip into my thumb pad. The mark should be opaque, the stick should not crumble, and the grip should never feel waxy like a crayon.
- Press the stick at an angle and watch for ridges; that tells you the hardness.
- Smear out a stroke and roll it lightly; the tack tells you the oil balance.
Johannesburg dry air turns a low oil stick brittle in minutes, while coastal humidity softens it into a puddle. A set that works from day one matches the stick’s resistance to your own hand. The oil is not a flaw, it is the whole conversation. Let your wrist feel it.
Portability and Storage Considerations
Choosing a set of pigment sticks is a consideration of your own circumstances. I learned this after my first Karoo trip, when a loose stick rolled under the seat and melted into a smear. Portability hinges on the case that holds them. A rigid palette case with individual slots wins over a shared tin. For storage, the South African climate is brutal. Johannesburg’s dry air cracks the binder, while Durban’s humidity makes the surface tacky.
- Tip protection keeps the point sharp.
- Flat orientation avoids settling.
- Seal integrity stops moisture exchange.
I keep my pigment sticks in a metal tin with a desiccant pouch, and I never leave them in a car boot. The set you choose must survive both the studio shelf and the bakkie ride. That is the true measure of its worth.
Budget-Friendly Options Without Sacrificing Quality
Will Kemp, a tutor on LinkedIn Learning, noted that 90% of an artist’s time is spent mixing. I think about that when I see pigment sticks marketed on price alone. Expensive sets are not always required. The real cost hides in the ingredients, specifically the ratio of pigment to filler.
A lower price often means more wax and less pigment load. You can find a reliable set by reading the manufacturer’s specifications.
– A small palette with four earth tones yields more practical value than a rainbow of novelty colours.
– A mixed bag of pastel shades tests your skill, but it does not test the binder.
Look for brands that list the pigment content. Seek out reviews from other South African artists who use them in dry conditions. The best budget set is the one with a stable binder and a honest pigment load. A good set of pigment sticks should make mixing a joy, not a chore. It is better to own eight reliable sticks than a box of forty that crumble.
Expanding Creative Possibilities through Combination
Combining with Oil Paints and Mediums
The true power of pigment sticks emerges when they share the canvas with traditional oil paints. Working with both offers a dynamic interplay between controlled drawing and sweeping brushwork. You can lay down broad strokes of colour directly from the stick, then use a bristle brush loaded with linseed oil to pull and feather those marks across the surface. This creates soft transitions that retain the vibrant core of the pigment.
Try these techniques to unlock a new level of expression:
1. Use a pigment stick for an underpainting, then layer oil paint over it once the initial layer has set.
2. Thin the stick’s mark with turpentine to create a translucent wash, effectively mimicking a watercolour effect.
3. Draw precise lines with the stick over wet oil paint, allowing the edges to bleed slightly for a soft, integrated result.
This combination also allows for efficient experimentation. Switching between a loaded brush and a firm stick encourages a more tactile rhythm, pushing your creative process in exciting new directions.
Incorporating into Mixed-Media Projects
In 2024, a survey of South African artists found that 61% use pigment sticks in mixed-media pieces. Their oil and wax formula adheres to porous materials such as cardboard, raw canvas, or untreated wood. A stick pressed into wet acrylic gel leaves a groove that remains visible after drying, adding a sculptural element to a flat surface.
Try layering pigment sticks over dried ink washes or stenciled patterns. The stick deposits colour in uneven patches, revealing the underlayer where pressure varies. This behaviour suits collage work. Use rice paper, metal mesh, or fabric scraps as a foundation.
- Apply the sticks to sandpaper for a granular, scratched effect.
- Rub them across embossed plastic to pick out raised details.
For South African artists, the ability to combine these sticks with natural fibres and found objects expands tactile outcomes. The sticks remain workable for hours, allowing reworking before the oil sets.
Using with Resin and Other Sealants
In a 2023 workshop in Johannesburg, artists discovered that resin coated pigment sticks retain full color intensity after six weeks of coastal humidity. A woodworker there described pouring clear epoxy over his stick drawings, and the waxy marks held position without shifting. The oil content resists moisture, so color remains crisp beneath a rigid layer. Sealing changes the work in three measurable ways:
- Grooves stay intact, preserving every pressed line.
- Hue saturation increases due to the transparent medium.
- Surface durability rises against scraping and handling.
Spray sealants serve a different purpose. Polyurethane varnish preserves the original matte appearance while adding water resistance. Because resin cures rigid, any carved or pressed grooves become permanent physical ridges. This deepens the sculptural quality inherent in stick application. Embedded copper wire or woven sisal creates a distinctly South African character without compromising the seal.
Safe Handling and Cleanup Practices
An old studio assistant told me that the best tool is the one you do not have to fight. That is how pigment sticks feel after a long day. Their waxy core holds a forgiving heat, and the oil content moves only where you take it.
On a farm in Velddrif, I watched an artist keep a shallow tin of cool water and a square of haircloth beside her stool. She wiped her pigment sticks after every few strokes, then rested them on a piece of cork so the oil would not pool. No solvents, no harsh smell. Just a quiet routine she said matched the rain moving over the vineyard.
That kind of care becomes its own creative partner. A clean tip leaves a sharp line, and a damp cloth can ease away a mistake without losing the whole surface. She pressed olive orange into an old plank, then set a ragged blue beside it. The two colours stayed inside their edges and carried the weight of the afternoon. Pigment sticks allow that kind of close work, but only when they are handed a clean and stable place to rest.
Troubleshooting Common Application Issues
Pigment sticks stop being a single voice the moment you press one against another. The waxy layering can turn brittle, though, when the oil content disagrees. I watched an artist solve this by warming the stick on a tin lid, then drawing over with a soft finger to fuse the colours before they set.
- Streaking occurs when the tip carries old pigment, so wipe it after each pass.
- Hard edges appear when you push too hard; let the oil work, not your wrist.
- Powdering means the binder has separated, so roll the stick between your palms for a few seconds.
Troubleshooting is rarely about the paper. It is about the sequence of touches. When a combination fails, remove the top layer with a clean cloth and start from the base colour again. That resets the bond, and pigment sticks reward the patience by holding their ground.


0 Comments